
Drupal Console is software which allows you to alter your Drupal installation through the command line. According to the official website, “The Drupal Console is a CLI tool to generate boilerplate code, interact and debug Drupal 8.” Unlike Drush, Drupal Console is specifically for Drupal 8, the latest major release.
Although Drupal Console and Drush share many capabilities such as clearing the cache, generating one-time login links, or un/installing modules/themes, one distinct functionality that comes out of the box with Drupal Console is that it can generate boilerplate code for modules, themes, controllers, forms, blocks, and much more.
Installing Drupal Console
Setting up Drupal Console is just as easy as executing the following commands found on the homepage of the website:
# Run this in your terminal to get the latest project version:
curl https://drupalconsole.com/installer -L -o drupal.phar

# Or if you don't have curl:
php -r "readfile('https://drupalconsole.com/installer');" > drupal.phar

# Accessing from anywhere on your system:
mv drupal.phar /usr/local/bin/drupal

# Apply executable permissions on the downloaded file:
chmod +x /usr/local/bin/drupal
To check if Drupal Console is working, execute drupal list. You should see a list of commands:
$ drupal list
Drupal Console version 0.10.5

Usage:
command [options] [arguments]

Options:
...

Available commands:
...
module
...
multisite
...
site
site:debug List all known local and remote sites.
site:install Install a Drupal project
site:new Create a new Drupal project
theme
...
yaml
...
Downloading Drupal
Let’s start from the beginning. We can actually get any version of Drupal by running drupal site:new:
$ drupal site:new

Enter the directory name when downloading Drupal:
> drupal

Getting releases for Drupal

Select a core release:
[0 ] 8.0.2
[1 ] 8.0.1
[2 ] 8.0.0
[3 ] 8.0.0-rc4
[4 ] 8.0.0-rc3
[5 ] 8.0.0-rc2
[6 ] 8.0.0-rc1
[7 ] 8.0.0-beta16
[8 ] 8.0.0-beta15
[9 ] 8.0.0-beta14
[10] 8.0.0-beta13
[11] 8.0.0-beta12
[12] 8.0.0-beta11
[13] 8.0.0-beta10
[14] 8.0.0-beta9
> 0

Downloading drupal 8.0.2

[OK] Drupal 8.0.2 was downloaded in directory /home/ubuntu/workspace/drupal
Installing Drupal
Now, you might be thinking to go visit the running website to install Drupal. Wrong! Well, right you can do that. But, it is also possible via Drupal Console by simply running drupal site:install inside the drupal directory:
$ drupal site:install

Select Drupal profile to be installed:
[0] Minimal
[1] Standard
> 1

Select language for your Drupal installation [English]:
>

Drupal Database type:
[0] MySQL, MariaDB, Percona Server, or equivalent
[1] SQLite
[2] PostgreSQL
> 0

Database Host [127.0.0.1]:
>

Database Name:
> drupal

Database User:
> {YOUR_DATABASE_USERNAME}

Database Pass [ ]:
> {YOUR_DATABASE_PASSWORD}

Database Port [3306]:
>

Database Prefix [ ]:
>

Provide your Drupal site name [Drupal 8 Site Install]:
> Drupal Console is Awesome!

Provide your Drupal site mail [[email protected]]:
> {YOUR_SITE_MAIL}

Provide your Drupal administrator account name [admin]:
> {YOUR_USER_NAME}

Provide your Drupal administrator account mail [[email protected]]:
> {YOUR_USER_MAIL}

Provide your Drupal administrator account password:
> {YOUR_USER_PASSWORD}

Starting Drupal 8 install process

[OK] Your Drupal 8 installation was completed successfully
Our new Drupal site should now be ready to be worked on:

Activating Maintenance Mode
It is best to set a website in production to maintenance mode when being worked on. Be sure to log in first, so you can view the development of the site. Then you can turn on maintenance mode with drupal site:maintenance on:
$ drupal site:maintenance on
Operating in maintenance mode on

Rebuilding cache(s), wait a moment please.

[OK] Done clearing cache(s).
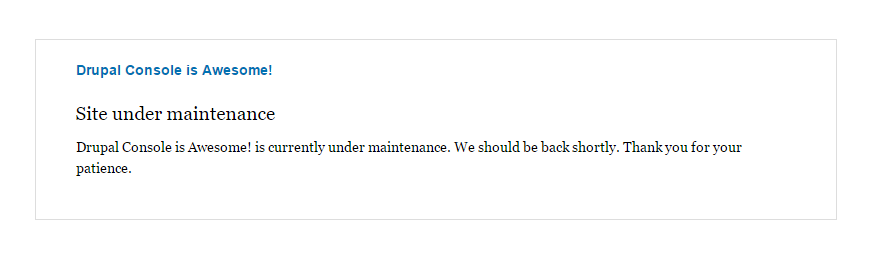
Now, this is what regular users will see when visiting the website:
Creating a Hello World Module
DEFINING MODULE PARAMETERS
First let’s generate code to define the module such as the .info.yml and the composer.json files by running drupal generate:module:
$ drupal generate:module
// Welcome to the Drupal module generator
Enter the new module name:
> Hello World
Enter the module machine name [hello_world]:
>
Enter the module Path [/modules/custom]:
>
Enter module description [My Awesome Module]:
> Say Hello World
Enter package name [Custom]:
>
Enter Drupal Core version [8.x]:
>
Do you want to generate a .module file (yes/no) [no]:
>
Define module as feature (yes/no) [no]:
>
Do you want to add a composer.json file to your module (yes/no) [yes]:
>
Would you like to add module dependencies (yes/no) [no]:
>
Do you confirm generation? (yes/no) [yes]:
>
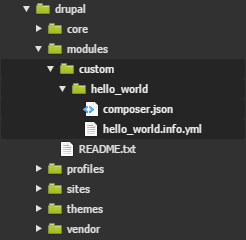
Generated or updated files
Site path: /home/ubuntu/workspace/drupal
1 - modules/custom/hello_world/hello_world.info.yml
2 - modules/custom/hello_world/composer.json
INSTALLING THE MODULE
Again, we can just enable to module using the command line using drupal module:install {PLUGIN_MACHINE_NAME}:
$ drupal module:install hello_world

[OK] The following module(s) were installed successfully: hello_world

Rebuilding cache(s), wait a moment please.

[OK] Done clearing cache(s).
GENERATING THE CONTROLLER
Now, we need to generate a controller that will show the “Hello World” page. Do this using drupal generate:controller:
$ drupal generate:controller

// Welcome to the Drupal Controller generator
Enter the module name [hello_world]:
>

Enter the Controller class name [DefaultController]:
> HelloWorldController

Enter the Controller method title (leave empty and press enter when done) [ ]:
> Hello World

Enter the action method name [hello]:
> helloWorld

Enter the route path [hello_world/hello/{name}]:
> /hello/world

Enter the Controller method title (leave empty and press enter when done) [ ]:
>

Do you want to generate a unit test class (yes/no) [yes]:
>

Do you want to load services from the container (yes/no) [no]:
>

Do you confirm generation? (yes/no) [yes]:
>

Generated or updated files
Site path: /home/ubuntu/workspace/drupal
1 - modules/custom/hello_world/src/Controller/HelloWorldController.php
2 - modules/custom/hello_world/hello_world.routing.yml
3 - modules/custom/hello_world/Tests/Controller/HelloWorldControllerTest.php

Rebuilding routes, wait a moment please

[OK] Done rebuilding route(s).
This will automatically generate our controller file, routing file, and even our Test file.

FINISHED MODULE
Now, if we visit http://www.mydrupalwebsite.com/hello/world, we should see:
